Spring Security 实战
通过该项目,我们用 Spring Security 来实现对系统的安全管理。
我们在上一节创建的 security-in-action项目的基础上,做一些修改。
后台代码
安全配置类
增加 com.waylau.spring.boot.security.config 包,用于放置项目的配置类。在该包下,我们创建 SecurityConfig.java :
@EnableWebSecurity
public class SecurityConfig extends WebSecurityConfigurerAdapter {

    /**
     * 自定义配置
     */
    @Override
    protected void configure(HttpSecurity http) throws Exception {
        http
            .authorizeRequests()
                .antMatchers("/css/**", "/js/**", "/fonts/**", "/index").permitAll()  // 虽都可以访问
                .antMatchers("/users/**").hasRole("USER")   // 需要响应的角色才能访问
                .and()
            .formLogin()   //基于 Form 表单登录验证
                .loginPage("/login").failureUrl("/login-error");
    }

    /**
     * 认证信息管理
     * @param auth
     * @throws Exception
     */
    @Autowired
    public void configureGlobal(AuthenticationManagerBuilder auth) throws Exception {
        auth
            .inMemoryAuthentication()  // 认证信息存储于没内存中
                .withUser("waylau").password("123456").roles("USER");
    }
}
我们的安全配置类 SecurityConfig 是继承自了WebSecurityConfigurerAdapter。 WebSecurityConfigurerAdapter提供用于创建一个Websecurityconfigurer 实例方便的基类。实现允许重写方法的自定义。
其中,我们重写了 configure 方法:
- permitAll() 是指允许任何人访问的方法,包括匹配 css、js、fonts 路径的 URL 以及 index 页面。 * 所有匹配 users 的 URL 请求需要用户进行身份验证。在本例中,用户必须并且具备 USER 角色 才有权限访问 users 路径下的资源。
- formLogin() 表明这是个基于表单的身份验证,指明了登入的 URL 路径以及登陆失败的 URL 。
configureGlobal 方法创建了基于内存的身份认证管理器。在本例,我们存储了用户名为 waylau 密码为 123456 角色为 USER 身份信息。configureGlobal 方法可以是任意名字,但在类似必须要有
@EnableWebSecurity、@EnableGlobalMethodSecurity或 @EnableGlobalAuthentication注解。
控制器
@Controller
public class MainController {

    @GetMapping("/")
    public String root() {
        return "redirect:/index";
    }

    @GetMapping("/index")
    public String index() {
        return "index";
    }

    @GetMapping("/login")
    public String login() {
        return "login";
    }

    @GetMapping("/login-error")
    public String loginError(Model model) {
        model.addAttribute("loginError", true);
        model.addAttribute("errorMsg", "登陆失败,用户名或者密码错误!");
        return "login";
    }

}
控制器说明:
- 当访问根路径或者
/index路径时,将会跳转到 index.html 页面。 - 访问
/login路径时,将会跳转到 login.html 页面。 - 登陆失败,将会重定向到
/login-error路径时,最终会跳转到 login.html 页面。其中,在页面里面,我们绑定了错误提示信息。
前端代码
index.html
在前端,我们创建了index.html 作为我们的主页:
......
<div sec:authorize="isAuthenticated()">
    <p>已有用户登录</p>
    <p>登录的用户为: <span sec:authentication="name"></span></p>
    <p>用户角色为: <span sec:authentication="principal.authorities"></span></p>
</div>
<div sec:authorize="isAnonymous()">
    <p>未有用户登录</p>
</div>
......
其中:sec:authorize和sec:authentication属性是由 Thymeleaf Spring Security 库提供的扩展支持,可以方便的用 sec 标签来获取认证、授权方法的信息。比如本例,
sec:authorize="isAnonymous():判断用户是否未认证;sec:authorize="isAuthenticated():判断用户是否经过认证;sec:authentication="name":获取到了用户的名称;sec:authentication="principal.authorities":获取到了用户的角色。
想了解该库的更多信息,可以参阅https://github.com/thymeleaf/thymeleaf-extras-springsecurity。
header.html
在前端,我们修改了 header.html:
......
<ul class="navbar-nav mr-auto navbar-right">
  <li class="nav-item" sec:authorize="isAnonymous()">
    <a class="nav-link" href="/login" th:href="@{/login}">登录 </a>
  </li>
   <li class="nav-item" sec:authorize="isAuthenticated()">
        <span class="nav-link"  sec:authentication="name"></span>
  </li>
  <li class="nav-item">
        <form action="/logout" th:action="@{/logout}" method="post">
            <input class="btn btn-default  " type="submit" value="退出" />
        </form>
  </li>
</ul>
......
菜单栏会根据用户是否认证了来显示不同的信息:
- 未认证:现实“登录”按钮
- 已认证:现实用户的名称
- 要退出时,发送 logout 表单请求到后台
运行
启动security-in-action项目后,访问
用户未认证访问主页时:

当试图访问“用户管理”时,被重定向到了登录页面:

我们用默认的 waylau 用户进行登录后可以访问“用户管理”:
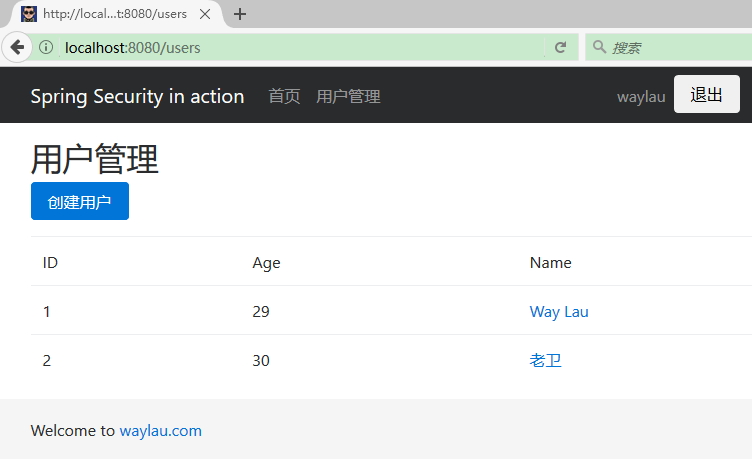
用户经过认证后访问主页时:

相关问题解决
问题1
Invalid CSRF Token 'null' was found on the request parameter '_csrf' or header 'X-CSRF-TOKEN'.
自 Spring Security 3.2 起,启用了 CSRF 保护机制。所以 Form 表单提交必须满足以下条件:
- HTTP 方法必须是 POST;
- CSRF token 必须添加到请求。由于使用了
@EnableWebSecurity和 Thymeleaf,CSRF token 将自动添加到一个隐藏的<input>里面(查看源码看到)。;类似于<input type="hidden" name="_csrf" value="f912aef3-f9a2-4c22-852e-db8cecf4175a"/>
解决方法是,加上 Thymeleaf 标签,比如将
<form action="/users" method="post">
    ......
</form>
改为 :
<form th:action="@{/users}" method="post">
    ......
</form>
问题2
sec:authorize和sec:authentication属性不起作用
解决方法 1:
确定添加了 thymeleaf-extras-springsecurity4依赖,且与Thymeleaf 版本一致。
解决方法 2:
<bean id="templateEngine" class="org.thymeleaf.spring4.SpringTemplateEngine">
  ...
  <property name="additionalDialects">
    <set>
      <!-- Note the package would change to 'springsecurity3' if you are using that version -->
      <bean class="org.thymeleaf.extras.springsecurity4.dialect.SpringSecurityDialect"/>
    </set>
  </property>
  ...
</bean>
参考:
- https://github.com/thymeleaf/thymeleaf-extras-springsecurity
- http://stackoverflow.com/questions/28904176/thymeleaf-with-spring-security-how-to-check-if-user-is-logged-in-or-not
问题2
Error: Bootstrap tooltips require Tether (http://tether.io/)
解决:安装 Tether 即可。注意,由于 Bootstrap 了 Tether ,所以 Tether 的 CSS、JS 文件应在 Bootstrap 之前引入。