实现服务的注册与发现
本章节,我们将创建一个micro-weather-eureka-client 作为客户端,并演示如何让将自身向注册服务器进行注册,让其可以其他服务都调用。
开发环境
- Gradle 4.0
- Spring Boot 2.0.0.M3
- Spring Cloud Netflix Eureka Client Finchley.M2
更改配置
增加如下配置:
dependencies {
    //...

    compile('org.springframework.cloud:spring-cloud-starter-netflix-eureka-client')

    //...
}
一个最简单的 Eureka Client
@SpringBootApplication
@EnableDiscoveryClient
@RestController
public class Application {

    @RequestMapping("/hello")
    public String home() {
        return "Hello world";
    }

    public static void main(String[] args) {
        SpringApplication.run(Application.class, args);
    }
}
项目配置:
spring.application.name: micro-weather-eureka-client

eureka.client.serviceUrl.defaultZone: http://localhost:8761/eureka/
运行
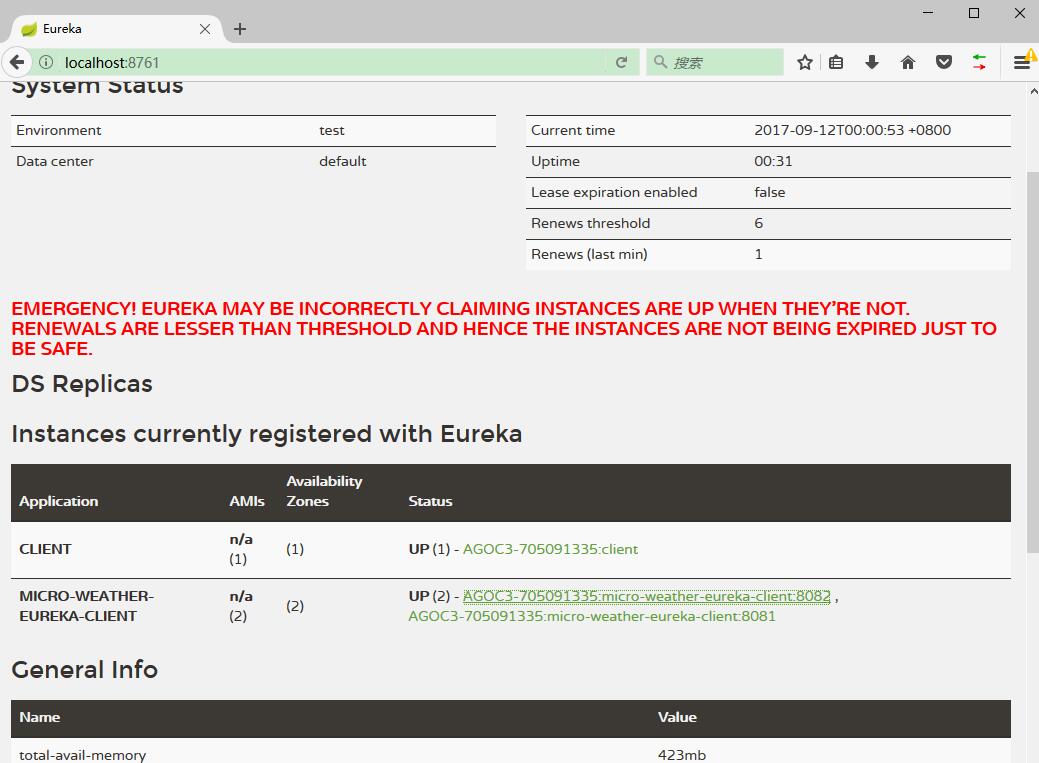
分别在 8081 和 8082 上启动了客户端示例。
java -jar micro-weather-eureka-client-1.0.0.jar --server.port=8081

java -jar micro-weather-eureka-client-1.0.0.jar --server.port=8082
可以在 Eureka Server 上看到这两个实体的信息。
源码
本章节源码,见micro-weather-eureka-server 和 micro-weather-eureka-client 。