Hello World
依照惯例,我们从一个 Hello World 项目入手。
我们新建了一个名为hello-world的 Gradle 项目。
基于Form 表单的登录认证。
环境
- Gradle 3.4.1
- Spring Boot 1.5.2.RELEASE
- Thymeleaf 3.0.3.RELEASE
- Thymeleaf Layout Dialect 2.2.0
Gradle Wrapper
修改 Gradle Wrapper 的配置 gradle-wrapper.properties,使用最新的Gradle:
distributionBase=GRADLE_USER_HOME
distributionPath=wrapper/dists
zipStoreBase=GRADLE_USER_HOME
zipStorePath=wrapper/dists
distributionUrl=https\://services.gradle.org/distributions/gradle-3.4.1-bin.zip
build.gradle
1. 自定义依赖的版本
我们可以自定义 Spring Boot 的版本,比如,我们使用了目前最新的 1.5.2.RELEASE 版本。
// buildscript 代码块中脚本优先执行
buildscript {
......
ext {
    springBootVersion = '1.5.2.RELEASE'
}

// 自定义  Thymeleaf 和 Thymeleaf Layout Dialect 的版本
ext['thymeleaf.version'] = '3.0.3.RELEASE'
ext['thymeleaf-layout-dialect.version'] = '2.2.0'
......
}
2. 修改项目的名称
修改 build.gradle 文件,让我们的hello-world项目成为一个新的项目。
修改内容也比较简单,修改项目名称及版本即可。
jar {
    baseName = 'hello-world'
    version = '1.0.0'
}
3. 修改项目的仓库地址
为了加快构建速度,我们自定义了一个国内的仓库镜像地址:
repositories {
    maven {
        url 'http://maven.aliyun.com/nexus/content/groups/public/'
    }
}
4. 指定依赖
// 依赖关系
dependencies {

    // 该依赖对于编译发行是必须的
    compile('org.springframework.boot:spring-boot-starter-web')

    // 添加 Thymeleaf 的依赖
    compile('org.springframework.boot:spring-boot-starter-thymeleaf')

    // 添加  Spring Security 依赖
    compile('org.springframework.boot:spring-boot-starter-security')

    // 添加   Thymeleaf Spring Security 依赖,与 Thymeleaf 版本一致都是 3.x
    compile('org.thymeleaf.extras:thymeleaf-extras-springsecurity4:3.0.2.RELEASE')

    // 该依赖对于编译测试是必须的,默认包含编译产品依赖和编译时依
    testCompile('org.springframework.boot:spring-boot-starter-test')
}
配置类
@EnableWebSecurity
public class SecurityConfig extends WebSecurityConfigurerAdapter {
    ......
    /**
     * 自定义配置
     */
    @Override
    protected void configure(HttpSecurity http) throws Exception {
        http
            .authorizeRequests()
                .antMatchers("/css/**", "/js/**", "/fonts/**", "/index").permitAll()  // 虽都可以访问
                .antMatchers("/users/**").hasRole("USER")   // 需要相应的角色才能访问
                .antMatchers("/admins/**").hasRole("ADMIN")   // 需要相应的角色才能访问
                .and()
            .formLogin()   //基于 Form 表单登录验证
                .loginPage("/login").failureUrl("/login-error");  // 自定义登录界面
    }
    ......
}
这段代码内容很少,但事实上已经做了很多的默认安全验证,包括:
- 访问应用中的每个URL都需要进行验证
- 生成一个登陆表单
- 允许用户使用用户名和密码来登陆
- 允许用户注销
- CSRF攻击拦截
- Session Fixation 攻击
- 安全 Header 集成
- 启用 HTTP Strict Transport Security
- X-Content-Type-Options.aspx) 集成
- Cache Control( 缓存控制 )
- X-XSS-Protection.aspx) 集成
- 集成 X-Frame-Options 来防止 Clickjacking
- 集成了以下 Servlet API :
- 所有匹配
/users/**的需要“USER”角色授权 - 所有匹配
/admins/**的需要“ADMIN”角色授权 - 基于 Form 表单登录验证的方式。登录界面指定为
/login,登录失败等会重定向到/login-error页面。如果不指定登录界面,则会Spring Security 会提供一个默认的登录页面:

那么,上述安全设置是如何默认启用的呢?我们观察下 SecurityConfig 所继承的 org.springframework.security.config.annotation.web.configuration.WebSecurityConfigurerAdapter类,其初始化的时候是这样的
http
    .csrf().and()
    .addFilter(new WebAsyncManagerIntegrationFilter())
    .exceptionHandling().and()
    .headers().and()
    .sessionManagement().and()
    .securityContext().and()
    .requestCache().and()
    .anonymous().and()
    .servletApi().and()
    .apply(new DefaultLoginPageConfigurer<HttpSecurity>()).and()
    .logout();
也就是说,它默认的时候就隐式的启用了多安全设置。
再看下其他几个方法:
/**
 * 用户信息服务
 */
@Bean
public UserDetailsService userDetailsService() {
    InMemoryUserDetailsManager manager = new InMemoryUserDetailsManager(); // 在内存中存放用户信息
    manager.createUser(User.withUsername("waylau").password("123456").roles("USER").build());
    manager.createUser(User.withUsername("admin").password("123456").roles("USER","ADMIN").build());
    return manager;
}

/**
 * 认证信息管理
 * @param auth
 * @throws Exception
 */
@Autowired
public void configureGlobal(AuthenticationManagerBuilder auth) throws Exception {
    auth.userDetailsService(userDetailsService());
}
其含义为:
- 用户的认证信息是使用 InMemoryUserDetailsManager 来存储在内存中;
- 我们默认生成了两个用户,一个是“waylau” 是拥有“USER”角色权限;另一个是“admin” 是拥有“USER”以及“ADMIN”角色权限
运行
运行程序,访问http://localhost:8080 页面。 当我们试图访问以下页面时,提示需要用户登录:
- “用户管理”:对应 “/users” URL;
- “管理员管理”:对应 “/admins” URL
登录页面:

使用具有“USER”角色授权的“waylau”用户登录,可以访问“用户管理”页面:

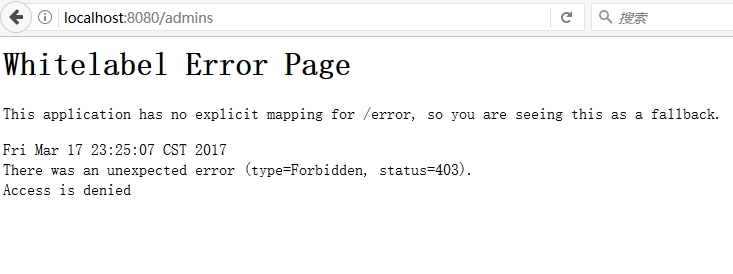
“waylau”用户登录可以访问“管理员管理”页面时,提示拒绝访问:

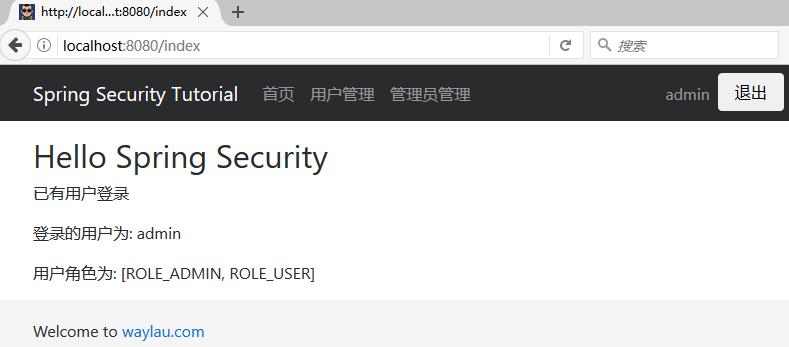
此时,我们换用 “admin”账号登录即可访问该页面。返回首页,我们能看到该用户的权限信息:

自定义 403 页面
默认的提示拒绝访问页面太丑,我需要自定义一个页面。我们在返回的页面里面提示“拒绝访问!”。
同时,我要在配置类里面,配置重定向的内容:
......
.formLogin()   //基于 Form 表单登录验证
    .loginPage("/login").failureUrl("/login-error") // 自定义登录界面
    .and()
.exceptionHandling().accessDeniedPage("/403"); // 处理异常,拒绝访问就重定向到 403 页面
......
最终效果:

处理登出
使用WebSecurityConfigurerAdapter时,应用会自动提供注销功能。 默认情况下,访问 URL /logout来注销用户。注销动作,做了以下几个事情:
- 使 HTTP 会话无效
- 清除配置了 RememberMe 身份认证的信息
- 清除 SecurityContextHolder
- 重定向到
/login?logout
与配置登录功能类似,我们也可以使用各种选项进一步自定义登出要求,比如:
http.logout().logoutSuccessUrl("/"); // 成功登出后,重定向到 首页
这样,成功登出后,重定向到 首页。
其他的还可以选项还有很多:
protected void configure(HttpSecurity http) throws Exception {
    http
        .logout()
            .logoutUrl("/my/logout")                         // 1
            .logoutSuccessUrl("/my/index")
            .logoutSuccessHandler(logoutSuccessHandler)      // 2
            .invalidateHttpSession(true)                     // 3
            .addLogoutHandler(logoutHandler)                 // 4
            .deleteCookies(cookieNamesToClear)               // 5
            .and()
        ...
}
- (1)自定义触发登出的 URL
- (2)指定一个自定义LogoutSuccessHandler
- (3)指定在注销时是否使 HttpSession 无效。默认情况下是 true
- (4)添加 LogoutHandler。默认情况下,SecurityContextLogoutHandler 作为最后一个 LogoutHandler 被添加
- (5)允许指定在注销成功时要删除的 Cookie 的名称。这是一个显式添加 CookieClearingLogoutHandler 的快捷方式